
It started, as many of my personal projects do, with a bit of yak shaving.
A few days ago, I was working on a new version of my website/portfolio. There’s nothing surprising here: I often work on that website on-and-off, not just to add features I think are important, but as a way to explore new technologies, to satisfy my own curiosity, and frankly, to scratch an itch for problem solving. In other words, see it, as I often do with my personal projects, as a mini zen garden.
Among other things, I was looking at redesigning the about page. And I realized the profile picture I have there is a bit old.
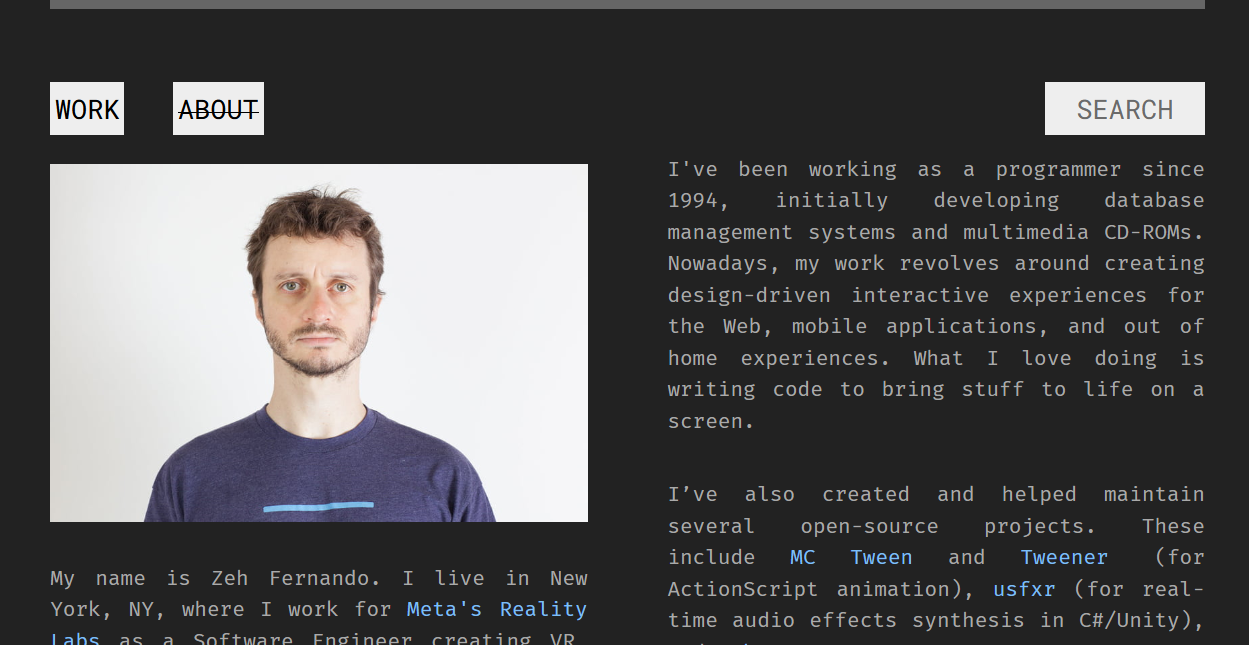
This picture was taken almost 10 years ago. There’s nothing technically wrong with that image; I still look the same, surprisingly. And I love this photo. However, I dislike the fact that it was taken as part of the marketing material for my previous job at Work & Co. It felt somewhat wrong to still be using it for personal reasons.
So I decided that, of course, for my new website, I’d finally update that picture. And since I’ve been using a variation of the image as my profile picture in many online/social networks, maybe I should update those as well. I just needed a new photo.
I don’t currently have a recent professional headshot, and quite frankly, I don’t feel like taking one. In the past, I’ve gone to great lengths to take some great-looking photos (I like photography), but I wanted something that felt a bit more real this time.
Digression: for the record, as another experiment, I did try getting ChatGPT to generate pictures with prompts like “Generate a corporate headshot of this person”, after feeding it some sharp pictures of mine. The results looked (hilariously) nothing like me.
Anyway, what do I have, instead? Well, have selfies. About a thousand of them. They’re not glamorous, they’re really often quite bad, but boy do I have them.

Every time I go for a run, I take a selfie after finishing. I then save it as part of my activity on Strava. Oddly, there’s no special reason for that. It was never a “project” or anything. I just I started doing it when I started running back from work, in 2018, as a way of registering how tired and sweaty I got. After a while, I had done it often enough that it felt wrong to stop, so now it’s part of my post-run routine. With about 6 runs per week, it’s quite a lot of selfies.
But how should I use them?
Many years ago, I created a project called “Average Friend”. This was a web app that would connect to your Facebook account (at a time when it had a real API), download the main profile picture for all your friends, and stack them together with some transparency, creating a composite of what your “average friend” looked like. That project was just an idea I had when I was at Firstborn, perhaps something that would be fun for a client. Sadly, it was never live publicly (I still own the averagefriend.com domain, so maybe one day it’ll be something).
Anyhow, I figured I could do something similar (visually), but with my own profile pictures. And that’s how Face Stack was born.
The idea was simple: get a bunch of selfie-like images as input, align them all (based on face location, scale, etc), blend them together, and save that as an image, an amalgamation of my post-run selfies. I could then use that as a new profile picture.
After downloading my data archive from Strava, I put all the images in a folder, manually removed non-selfie pictures, and renamed them to match the activity date (so they could be sorted chronologically). I was then ready to start actually creating the image.
The application itself would work well as a command line tool, so I started creating one using Rust. Thanks to its crates ecosystem, it was just a matter of cobbling things together to make the idea work.
In a short amount of time, using third-party image manipulation and face recognition crates, I had a tool that could stack the images and blend them with some given opacity. Behold the result:
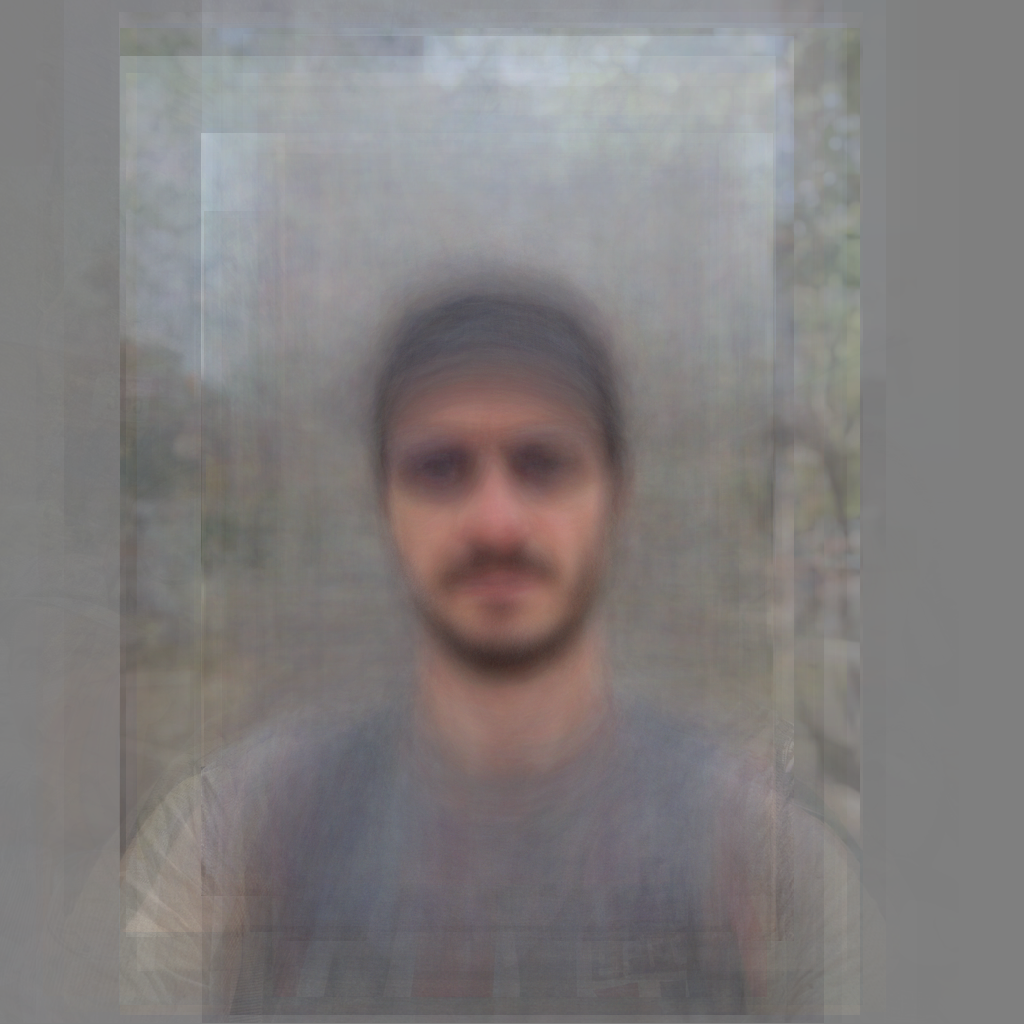
This produced a proper “average” of the images. The result is a bit blurry and quite gray. I should have expected that; that’s the sort of result I got with “Average Friend” as well.
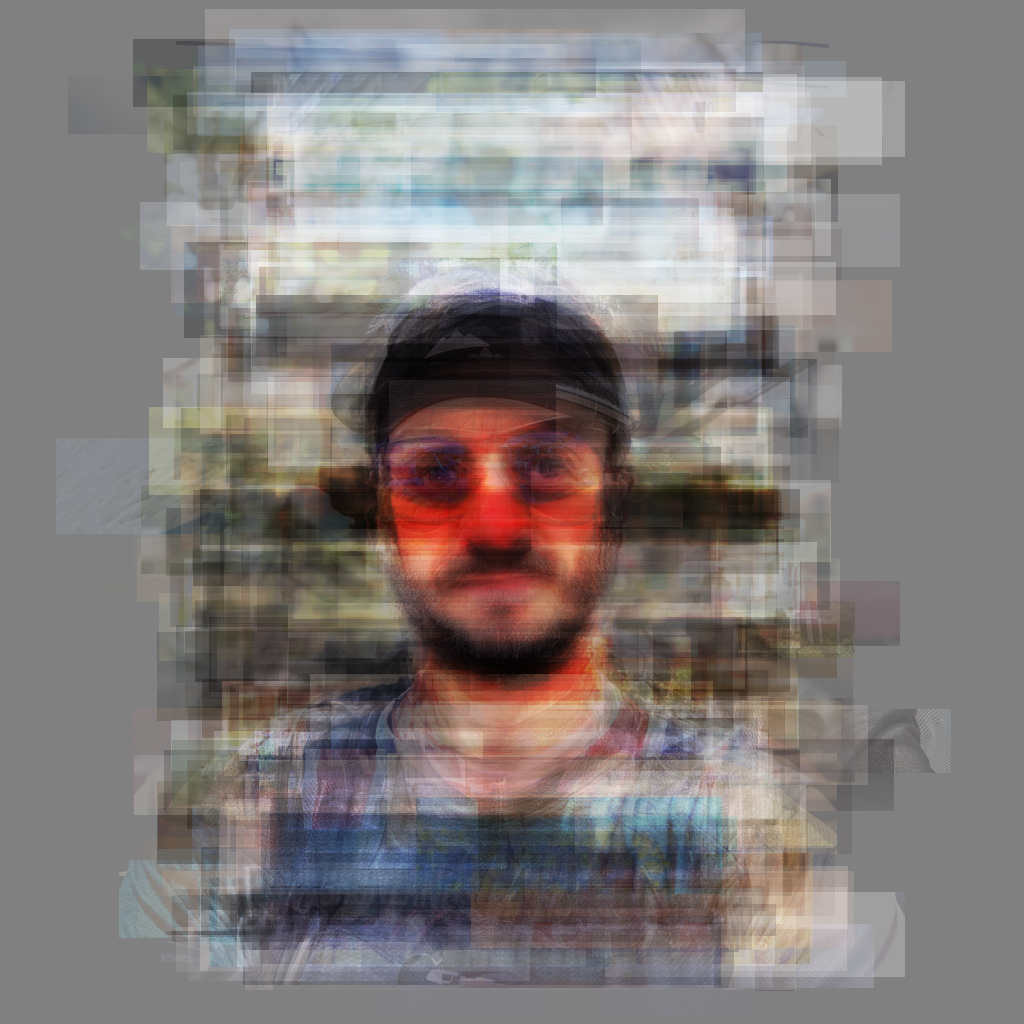
Over time, I started adding features: the ability to crop each new layer randomly, and new blending modes besides “normal” (which the program would cycled through). It got me to less average-y, more artistic, results like this:
I then added a bunch of command line arguments to the program to control the image output. It’s quite alright to have some options hardcoded in the program, and run it with “cargo run”, tweaking them on the go to see what was the result. I surely made a lot of that until I decided something was working as expected.
But in general, I find it more efficient, and more fun, to move everything to a high-level control system, so I can experiment more freely. Command line switches were it, in this case.
This is similar to the approach I took with Random Art Generator, which is also a command line tool for image synthesis. In that case, the command line arguments can get pretty complex – a bit of a given considering the different outputs the tool can produce – but having command “templates” I can reuse is invaluable.
In Face Stack’s case, I exposed options for controlling the blend of each image (crop size, blending mode, opacity) and a few other minor arguments (random number generator seed, size, general face scale, etc). Those can get pretty complex too, allowing for multiple inputs on some parameters with weighted randomization, ranges expressed in pixels or percentage, and the alike. Luckily, this was somewhat straightforward because I reused most of the parsing functions from Random Art Generator, so a lot of copying & pasting was involved.
In the end, I was able to play around with the program enough to see what sort of combinations produced an image I liked.
So after trying many different randomization seeds, and after cleaning up my source images to remove sub-optimal input candidates (pictures with sunglasses, face masks, balaclavas, etc), I got to this result:
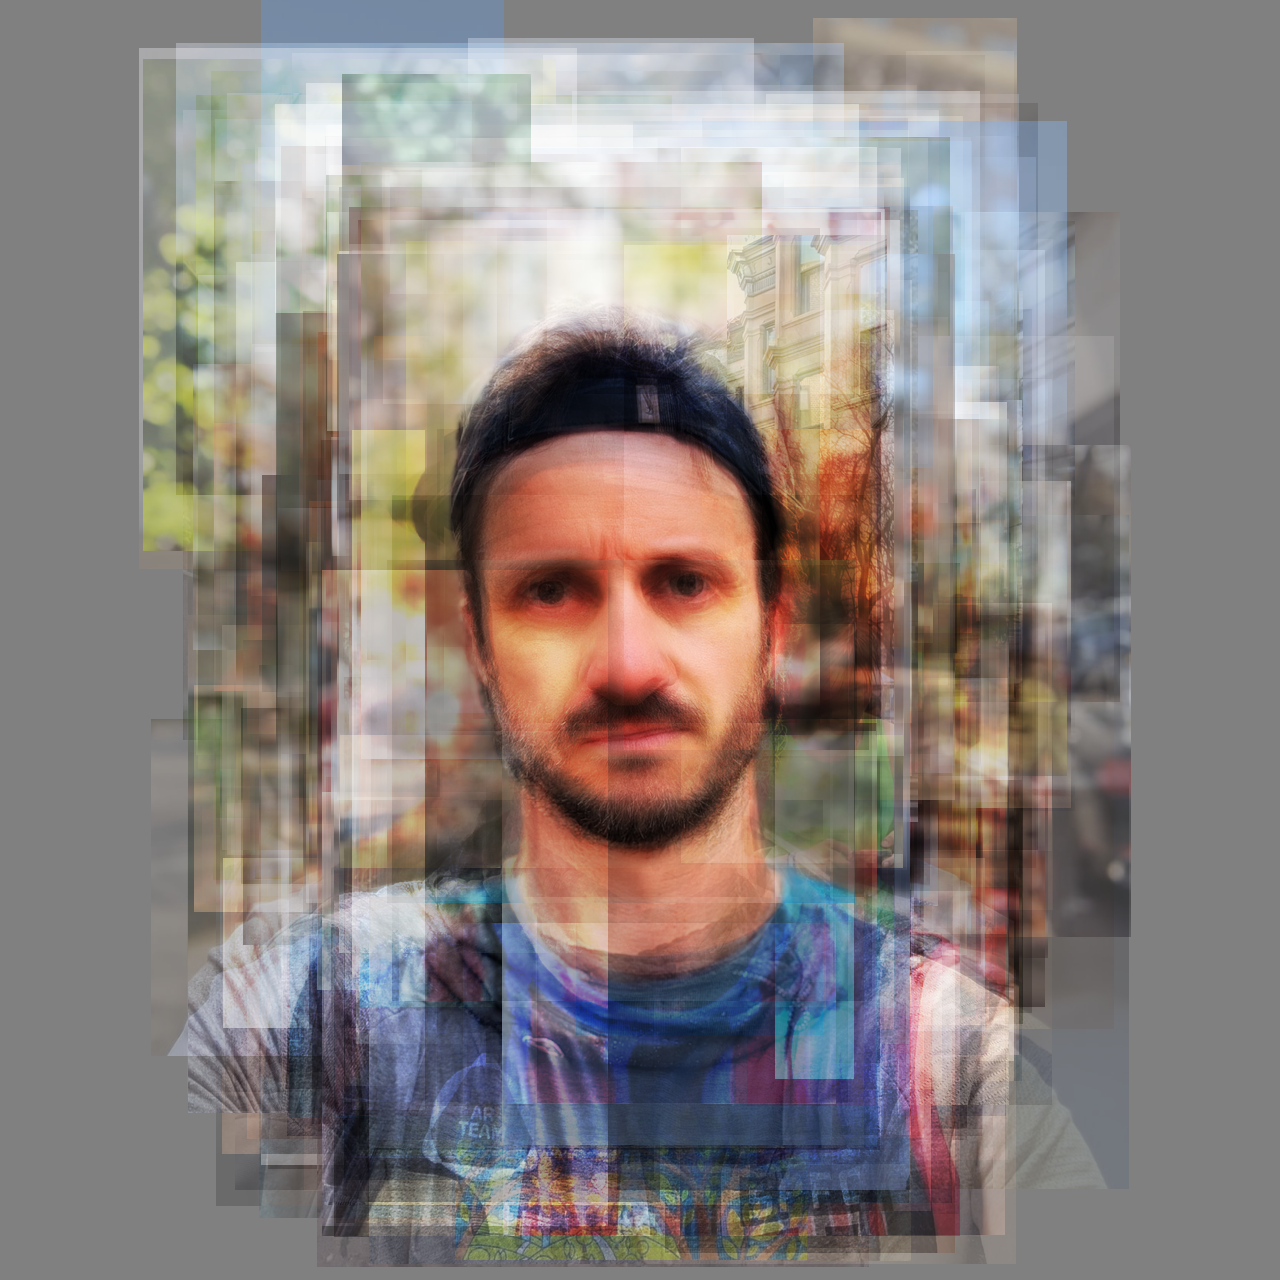
With this code used:
face-stack --input ./pics/select/*.jpg --size 1280x1280 --face-scale 0.5 --opacity 0.4 --crop-width 20%-60% --crop-height 10%-60% --blending-mode normal@5 soft-light@5 overlay@5 color-dodge --output output-select-s150-high.png --seed 150And that’s how I finally got to a new profile picture that I could use on a new “About” page, or random website profiles.
Despite it using all selfies I could find (since 2018), it has a bias for the most recent ones, since they’re layered on top in chronological order. This makes it more historically relevant than a picture taken almost 10 years ago.
So perhaps, 10 years down the line, I can just re-run this tool with new selfies, and avoid having to shave the yak once more.
The project and its source code is available on GitHub. And as a last note, some of my real-time thoughts can be seen in a Mastodon thread I published while working on this.